Raspberry Pi as a Server
Setting up a self-hosted home server
Why settle for something done poorly when you can do it better yourself? That’s the approach I took with creating a general, all-in-one media server / NAS. The main concern was relying on external, third-party software and services to conduct daily tech and media activities. The solution? Do it yourself. I’ve done exactly that, setting up a Raspberry Pi that I can tinker with and use daily, helping not only me but also my friends and family.
Using a Raspberry Pi 4 (4GB), an external hard-drive, and SD card, I’ve managed to get a mini PC running Debian Bullseye for under $300. Sounds like a lot, but once you see what it can do and the money it’s saving, it’s arguably worth it.

Why a Raspbery Pi?
Mini PC’s in Australia (and mobile devices in general) are expensive, meaning that sticking to the popular, tried and true Raspberry Pi ARM mini PC was the way to go (for me at least). Running a device 24/7 also raises concerns about power consumption. Running my desktop PC idling at 80 Watts obviously isn’t ideal. So the Raspberry Pi is an obvious choice, idling at only 3-4 Watts on average with background tasks.
Uses
Having 4GB of RAM leaves a bit of room for Docker containers and web services, but obviously doesn’t allow for extensive simultaneous hardware-acceleration or any gaming. Plenty of memory for my use case though, measuring the current usage with all the background processes, it uses about 2.9 out of the 4GB of memory available, leaving heaps of breathing room.
Currently some of the uses that it provides for me is an extensive amount of media management, from Plex and Jellyfin, providing access to movies and tv shows personally sourced from either blu-ray or on disc, to a music player backend using Navidrome which let’s me source my own music and access it anywhere.
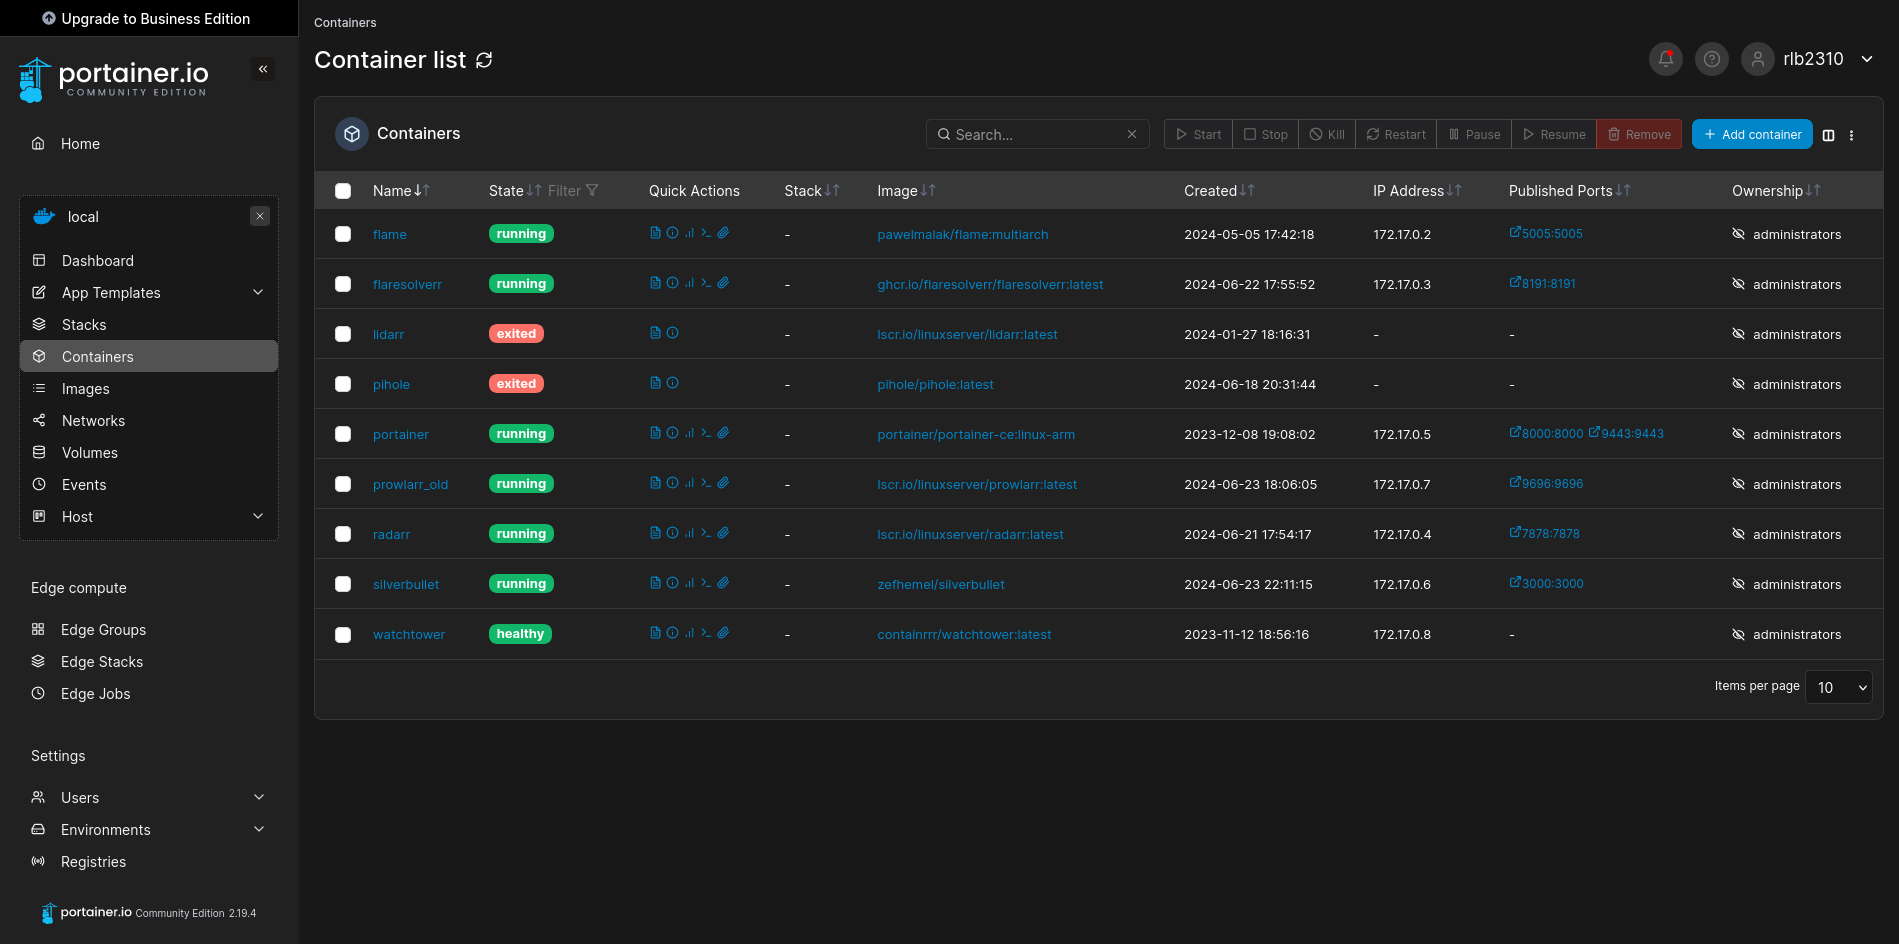
Majority of the services are deployed through Docker (even though I prefer barebones) because of the automatic image updates through Watchtower. Some services I had trouble with accessing specific folders mounted on the external drive through Docker, alognside some permission conflicts. This was solved by using the barebones version.
Managing all the docker containers was complete through Portainer, keeping the complicated Docker backend in a manageable web GUI.
External LAN access, security, and compromises
One downside of selfhosting is the lack of public access. Obviously you can port-forward, but that comes with extreme risks for not only your devices but the whole network. So that was immediately not an option for me. Next up was using a VPN. I had learnt of businesses who use VPNs for remote workers, giving access to company files and resources. So this was my next option. It allowed me to have the same amount of access to my resources, without compromising the rest of my network. The most popular approach to this is selfhosting a Wireguard or OpenVPN instance. Quite a complicated approach, and lacked some features I wanted such as the ability to use my Raspberryi Pi as an exit-node. Finally, I had settled for Tailscale. It was a perfect solution to accessing my server from other networks, all while being completely free for hobbyists like myself.
Tailscale provides individual users with a free Tailnet with a couple of devices meaning that it allows me to add my server, phone, two laptops, and my desktop. I can now use the provided Tailscale address of my server to host services that I want to access outside of the network, such as Navidrome for music.
By doing this, I have removed the need to port forward at all, keeping everything closed on my network. This was the primary concern with providing external access to services.
Realistically there’s so much more to go over with the Raspberry Pi and services I’ve set up, so some of the more complex and tedious services will have their own page. It will probably include things like like Nginx reverse-proxy for internal DNS control, as well as using Silverbullet for note taking with a server.